|
There are several
uses for the eraser tool: blending, making a “shadow image,” creating
interesting effects with text, and making a border. We will go through all of
them. For this tutorial I will be using an image that is larger than the
standard 100 by 100 avatar/icon size but the technique remains the same (it’s easier to see this way), except that where
I use the Galaxy, Big (100 x 100) brush it is easier to use the Circle (19) brush on smaller graphics.
Basic information
on the eraser tool is available through the GIMP help page.
BLENDING
Go to File>New. Select a width of 500 by 150 pixels. Now go HERE and save that picture somewhere easily accessible. Go back to GIMP and open
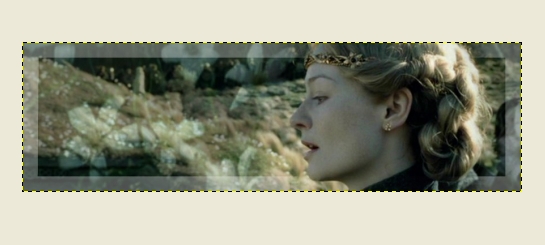
it (File>Open). Copy and paste it onto your original 500 by 150 image (base). Maximize this screen. You will now have
something like this:

Using the rectangular select tool (top left-hand corner) reposition the pasted
layer until Frodo is out of the picture. Now anchor the picture, either by going
to Layer>Anchor Layer, or simply by clicking on the background wherever you see an anchor about the rectangle. You are ready to add another layer at this point.
Go HERE and save this picture as well. Open it.
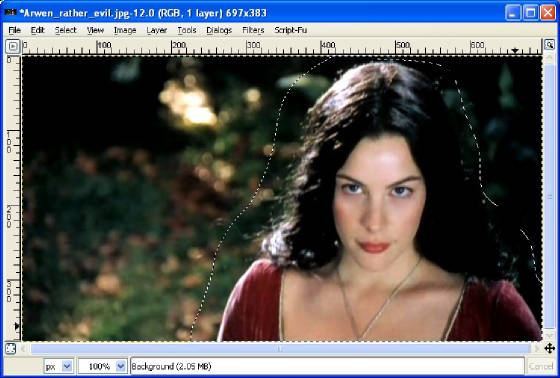
Click on the free select tool (two to the right of the rectangular select tool).
Under the symbols you will see options for each tool. One will say “Feather
edges.” Check the box. Then
set the radius to somewhere around 30 pixels. Go back to the picture and use
it to trace around Arwen. You don’t have to be exact—just somewhere
near her is fine.
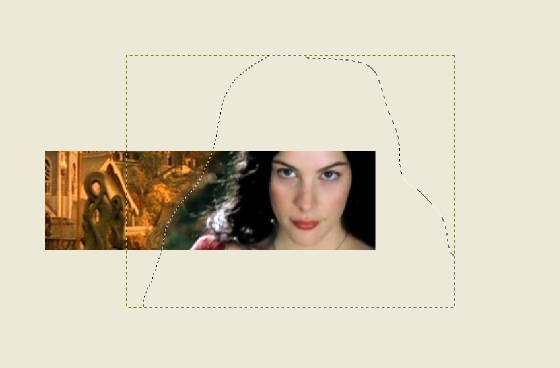
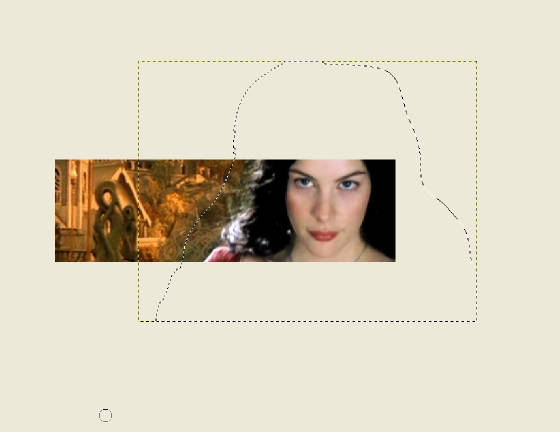
Now copy the layer you just
made of Arwen and paste it onto your base image (using CTRL+C and CTRL+V is fine for this).
Reposition her so that her face is approximately centered:
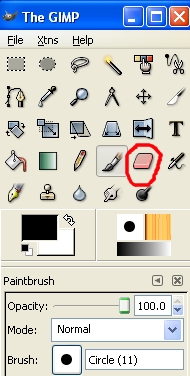
Select the eraser tool. This tool has options as well. Set the
opacity at about 15 and use “Circle (19)” for the brush. Now go back
to the image and erase whatever is showing of the background from the Arwen picture.
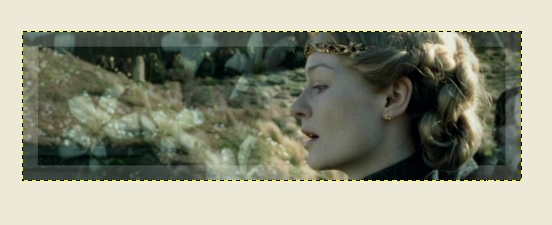
To do this, hold the left mouse button down move the mouse around to erase. When
you let the mouse button up GIMP starts erasing another level (i.e. another 15 % of what was just erased). Continue to erase until it looks something like this:
It doesn’t have to
be perfect, but most of the green should be gone. At this point you have a blended
image. Anchor the top layer and you’re done. Note that most graphics makers would not be satisfied with the way this looks and would change a number
of things about it, but for our purposes it is fine.
If at any time you need to
change something go to Edit>Undo, or simply use CTRL+Z. If you want to change
something you did five steps ago you will have to undo everything in between but it’s often worth it.
"SHADOW
IMAGE"
This
is my name for something that looks like this:
I use this effect a lot and
I think it’s a pretty neat one, so here goes. We will be using THIS PICTURE and THIS PICTURE, so save them somewhere easily accessible. Now make a new image that is 500
by 150 pixels. This will be your base.
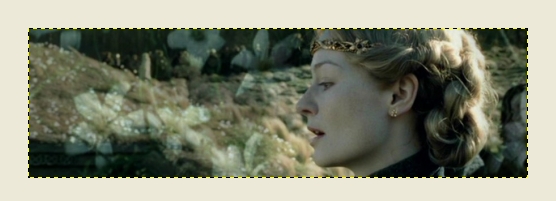
Open the picture of Eowyn
and copy and paste it onto your base image. Using the rectangular select tool,
position it so that her face is near the edge of the base. Obviously a lot of
it is cut off but we can fix that. Right click and go to Layer>Scale Layer. Enter 510 for the width. Anchor the layer. At this point the image will look something like this:

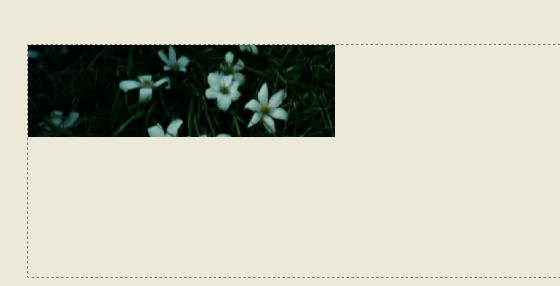
Now open the picture of the
simbelmyne. It is just about perfect for what we need but to make it even better
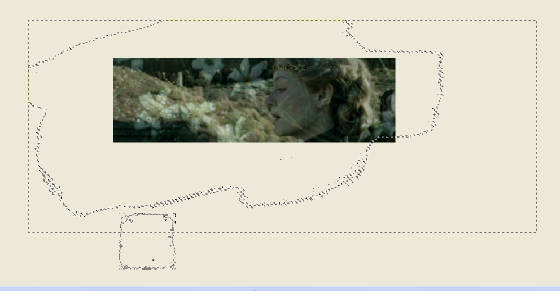
we can heighten the contrast. Go to Tools>Color Tools>Brightness and Contrast. Move the Contrast up to 40. Now copy
this picture and paste it onto your base image. It will now look like this:
Move the top
layer so that the flowers won’t be right on top of Eowyn’s face, if we can help it. Now go to the eraser tool. Move the opacity to about 20 and
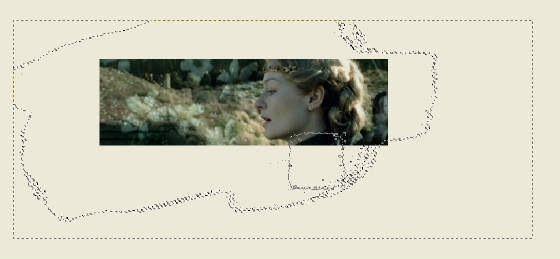
select the Galaxy, Big (100 x 100) brush. Begin erasing the top layer. Erase it about three times. Now you should have a better idea
of where to position it. You can actually move it so that Eowyn’s face
is framed very nicely between the flowers. Erase the whole thing once more.
Now, using that same brush,
go back over Eowyn so that she is clear. You should end up with something like
this:
Anchor the top layer and
save it. We’ll be using this image to explore what you can do with text
and erasing.
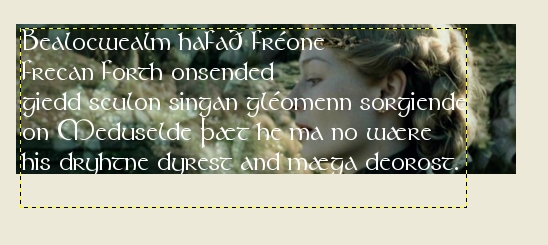
TEXT
We will be examining text
in depth in a different section, but for this we will be focusing on how to erase text to create interesting effects. For this I will be using a font called Tolkien which you can download at Arwen-Undomiel.com. You can, of course, use another font if you wish.
Open the image
we made in the last section and go to Layer>New Layer. Hit Okay. Now go to the main “control panel” of GIMP (The one that says The GIMP) and click on the text
button. Select the Tolkien font. For
color, select “ffffff.”
The text we will be using
is Eowyn’s Dirge for Theodred from the Two Towers
extended soundtrack:
Bealocwealm hafað fréone frecan forth onsended
giedd sculon singan gléomenn sorgiende
on Meduselde þæt he ma no wære
his dryhtne dyrest and mæga deorost.
Copy the text. Now go to the base image and click somewhere near the top left corner.
Paste the text into the GIMP Text Editor box that appears. I made “frecan
forth onsended” into a new line. Then I went back to the Text tool options
and change the text size to 28 or 29. You don’t have to do this exactly,
but play around with the text until you get it how you want it to look. Now go
to the eraser tool and select the Big Galaxy brush and make sure the opacity is at about 20.
At this point it all looks like this:
Take the eraser and erase
over all the text evenly. Now erase bits randomly so that some of it is brighter
than the others.
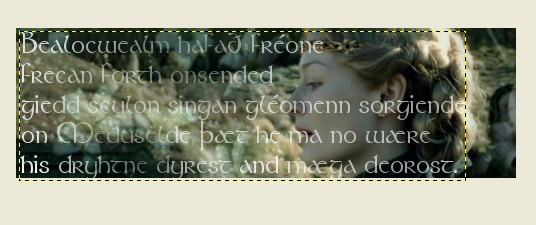
Now, still using the Galaxy
brush, erase the text that is over Eowyn’s face almost completely. Tada!
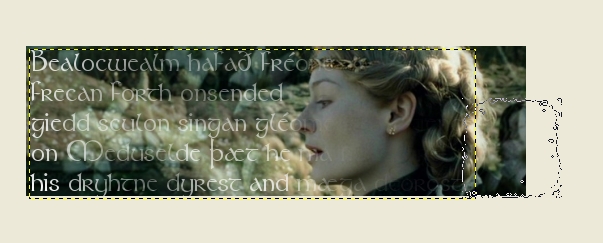
BORDER
Open the same image that we used for the
last bit (Eowyn and simbelmyne). If you saved the text that’s fine. Add an new layer. Go to the brush tool
and select the Circle (17) brush. Now click on the bottom left hand corner. While holding the left mouse button down, hold the Shift key down and move the mouse
so that the thin line is straight. Make sure the line reaches the bottom right
corner. Repeat until you have this:
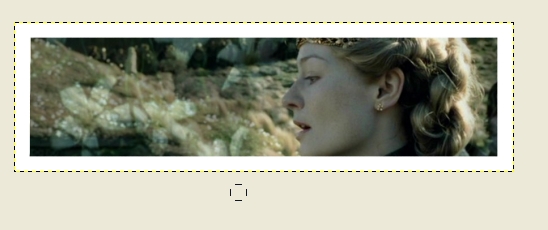
Now go to the eraser tool
and select the Big Galaxy brush. Erase the whole thing about five times. Then use that same brush to erase around Eowyn’s face. You can be finished here.
Or you can erase the whole
thing a few more times.
|


